Jetwriter AI keeps its settings in three places. In the extension, open Jetwriter on any page, click the profile icon at the top right of its window and choose Settings. In the web app at jetwriter.ai/app, click Settings in the sidebar. Your plan, billing, password and account are on your account page, jetwriter.ai/dashboard.
Which setting is where
| Setting | Where to find it |
|---|---|
| Keyboard shortcut | Extension: Settings, Extension Shortcut |
| The toolbar on selected text: on, off, per site, holding a key | Extension: Settings, Quick Actions Toolbar |
| Personalize AI: about you, and how to reply | Extension: profile menu, Personalize AI. Web app: Settings, Personalize AI |
| Memory of past conversations | Extension: Settings, Memory. Web app: Settings, Memory |
| Replies that learn from your past Gmail emails | Extension: Settings, Gmail Personalization. Web app: Settings, Gmail Integration |
| Auto-Drafts | Web app: Settings, Gmail Integration |
| Google Calendar | Web app: Settings, Calendar Integration |
| Your own API key (Free plan) | Extension: Settings, Advanced |
| Plan, upgrade, billing, invoices, cancelling | Account page: Current Plan |
| Team | Account page: Team Management |
| Email, password, signing out | Account page: My Account |
| Deleting your account | Account page: Delete Account |
| AI model, writing style and length | Not in settings: pick them under the box you type in, in the Jetwriter window |
Settings in the extension
- On any web page, open Jetwriter: click its icon in your browser's toolbar, or press Ctrl+Shift+K (Cmd+Shift+K on a Mac).
- Click the profile icon (1) at the top right of the Jetwriter window, next to the ×.
- Choose Settings (3). The Jetwriter AI Settings window opens.
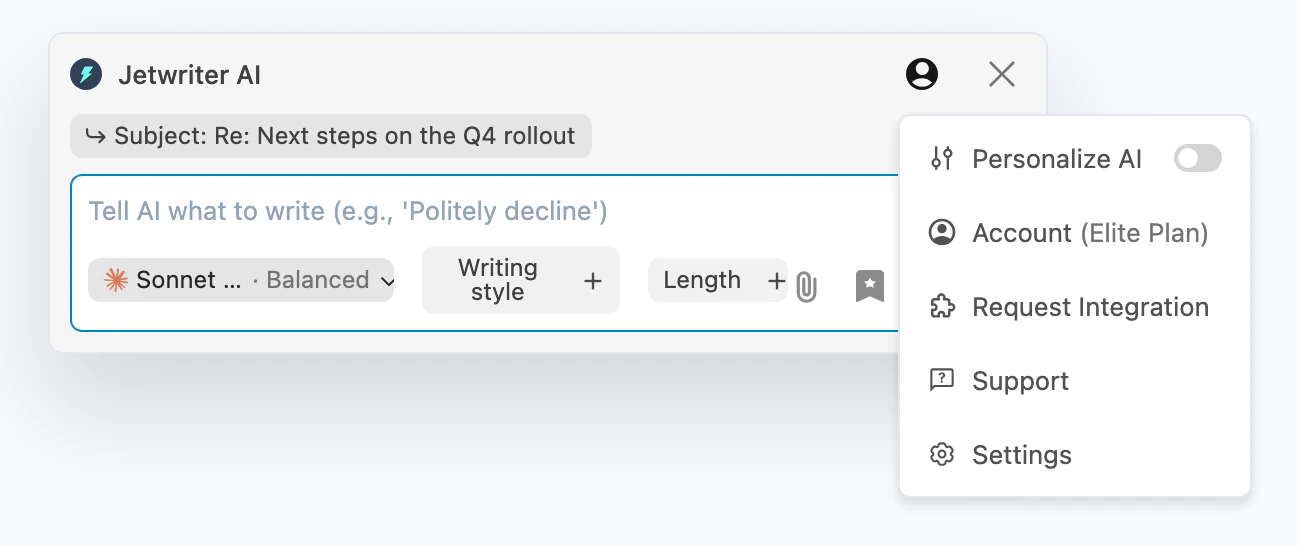
The profile icon at the top of the Jetwriter window opens a menu with Settings and a link to your account.
- Profile icon
- Account
- Settings
The profile menu also holds:
- Personalize AI, with a switch to turn it on or off, and the boxes where you tell Jetwriter about you and how to reply: see Tell Jetwriter about you, and how to reply.
- Account (2), which shows your plan and opens your account page.
- Request Integration, to ask for an AI Reply button on another site, and Support.
The profile icon only shows when you're signed in. If the window shows Login instead, sign in first: see Sign in to the extension.
You can also reach these settings from the toolbar that appears on selected text: move the pointer over the × at its end and choose Shortcut & Settings.
What the extension's settings window holds
To open the Jetwriter AI Settings window, click the profile icon at the top right of the Jetwriter window and choose Settings.
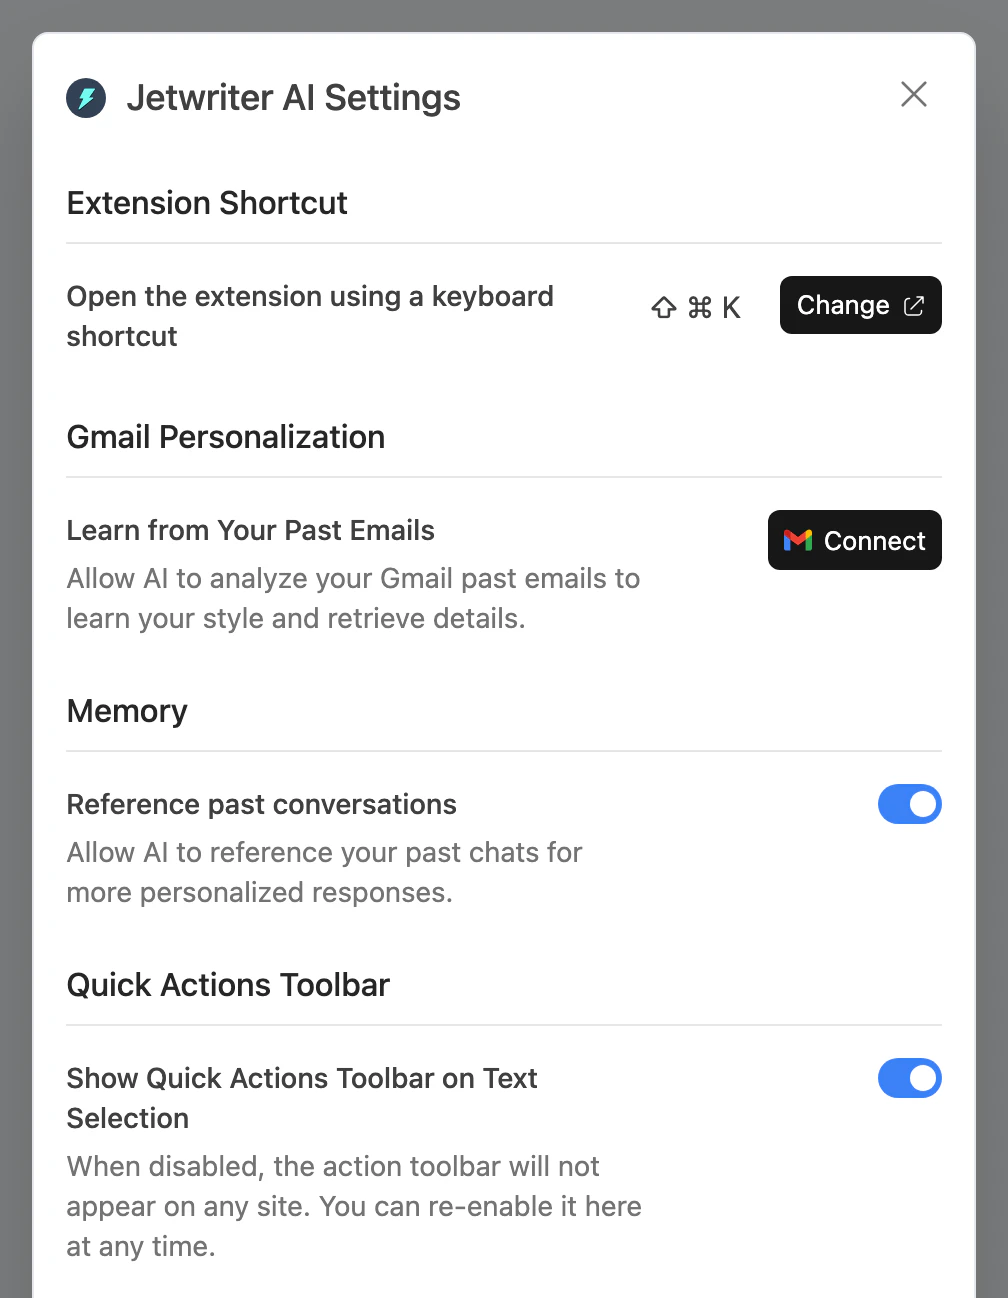
The extension's settings window, from the top: shortcut, Gmail, Memory and the toolbar on selected text.
From the top, it has:
- Extension Shortcut: the keys that open Jetwriter. Change opens your browser's shortcuts page: see Open Jetwriter on any page, and change the shortcut.
- Gmail Personalization: Connect lets replies learn from your past Gmail emails: see Connect Gmail so replies use your past emails, or disconnect it.
- Memory: the Reference past conversations switch, which lets the AI use your past chats.
- Quick Actions Toolbar: whether the toolbar shows on selected text always, only while you hold a key, or not at all, and the sites where it's off: see Hide the Jetwriter popup on a site, or everywhere.
- Advanced, on the Free plan only: Use your own API key. See Use your own OpenAI, Gemini or Claude key on the Free plan.
Settings in the web app
- Go to jetwriter.ai/app and sign in. This works on a computer or a phone.
- Click Settings in the sidebar on the left. If the sidebar is narrow, it's the gear icon. On a phone, tap the menu button at the top left first to open the sidebar.
- Pick a section (1): Personalize AI, Memory, Gmail Integration or Calendar Integration.
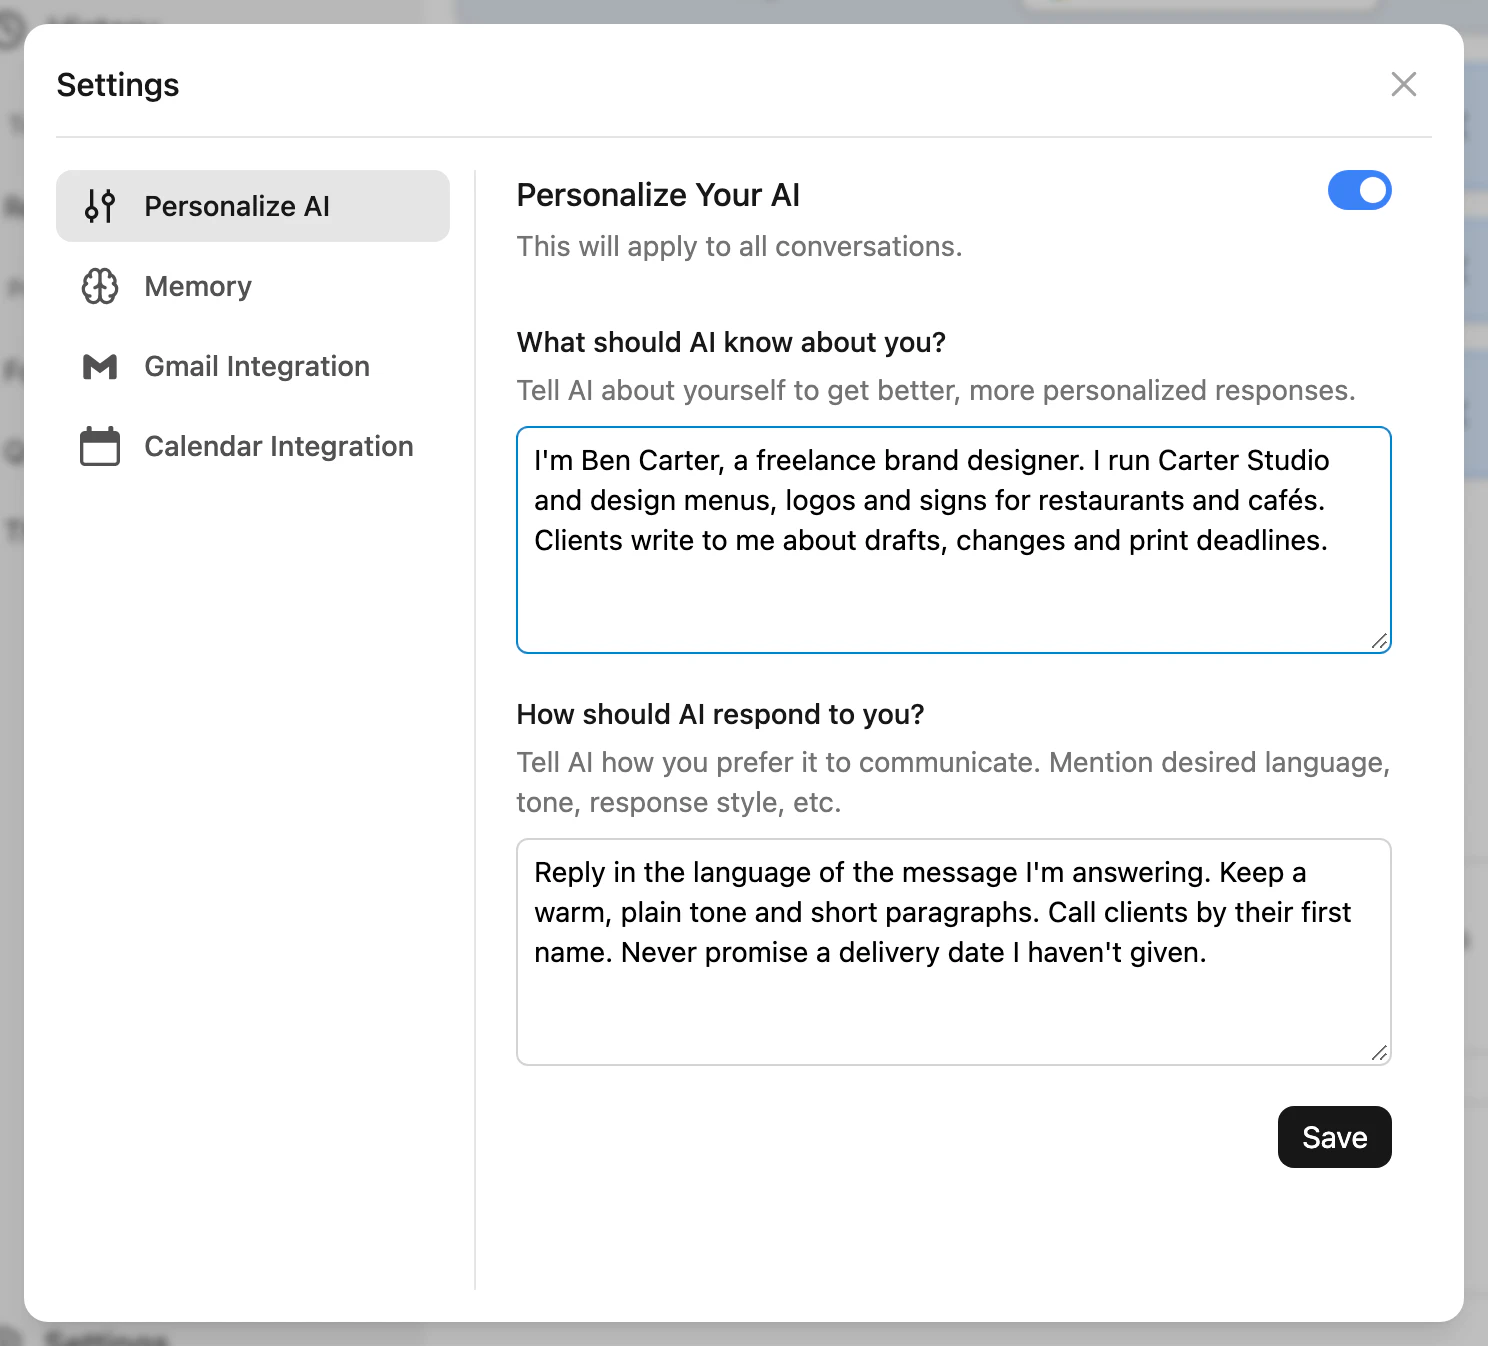
The web app's Settings window lists its four sections on the left.
- The four sections
Each section has its own link, which opens it directly once you're signed in:
- Personalize AI: jetwriter.ai/app#settings/personalizeAI
- Memory: jetwriter.ai/app#settings/memory
- Gmail Integration, for Gmail personalization and Auto-Drafts: jetwriter.ai/app#settings/gmailIntegration
- Calendar Integration: jetwriter.ai/app#settings/calendarIntegration
Personalize AI and Memory are in both the extension and the web app. What you write in Personalize AI is saved to your account, so both show the same text, but their on and off switches are set separately in each browser and in the web app.
Settings on your account page
Your account page is at jetwriter.ai/dashboard. To get there from the extension, choose Account in the profile menu; from the web app, click Account at the bottom of the sidebar. It has:
- Current Plan: your plan, with Upgrade on the Free plan, and Manage Billing once you've paid, which opens the billing page for your payment method, invoices and cancelling. See Get invoices and receipts, and add company details and Cancel your Jetwriter AI subscription.
- Monthly Usage, on paid plans: how much of your Advanced & Thinking models allowance you've used, and when it resets.
- Team Management: create a team, or manage yours.
- My Account: your email address, Change Password (or Set Password if your account has no password yet), and Logout.
- Delete Account: see Delete your Jetwriter AI account.